Save on select Weber Works™ Accessories* Shop Now.
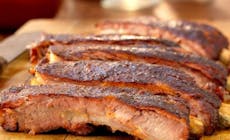
Cherry-Smoked Spareribs with Peach Barbecue Sauce
Jamie Purviance
- Serves 8
- 5 to 5:30 h
People
Serves 8
Prep Time
30 mins
Grilling Time
5 to 5:30 h

Ingredients
Instructions
the Ingredients

Rub
Special Equipment
- 4 cherry wood chunks or 4 handfuls cherry wood chips
- rib rack
- large disposable foil pan
- heavy-duty aluminum foil
Instructions
- In a medium bowl combine the rub ingredients.
- Cut off and discard the tough flap of meat hanging from the bone side of the spareribs along with any meat dangling from either end of each rack, creating a uniformly rectangular rack of ribs. Using a dull dinner knife, slide the tip under the membrane covering the back of each rack and lift until you can grab a corner of the membrane with a paper towel. Peel off the membrane and discard.
- Season the racks all over with the rub. Allow the racks to stand at room temperature for 30 minutes to 1 hour before grilling. Arrange the racks in a rib rack.
Related Grill Skills
Using a Rib Rack - If using wood chips, soak them in water for at least 30 minutes.
- Prepare the grill for for indirect cooking over low heat (250° to 300°F). If you’re using a charcoal grill, fill one charcoal basket about halfway with lit coals and position the basket to one side of the charcoal grate, as close to the edge as possible. Place a large disposable foil pan on the empty space of the charcoal grate and fill it three-quarters of the way with water. Put the cooking grate in place, close the lid, close the top vent halfway, and wait until the temperature falls to 300°F. (A foil pan is unnecessary for a gas grill.)
- Add two wood chunks to the charcoal or drain and add two handfuls wood chips to the charcoal or to the smoker box of a gas grill, following manufacturer’s instructions, and close the lid. When smoke appears, place the rib rack with the racks on the cooking grate as far from the heat as possible. Smoke the racks over indirect low heat, with the lid closed, for 1 hour.
- Meanwhile, if using a charcoal grill, light about 15 briquettes in a chimney starter to add to the fire in the next step, and let them burn until covered with gray ash. (You will need to do this again at 1-hour intervals.)
- After 1 hour of cooking, add the remaining two wood chunks to the lit charcoal or drain and add the remaining wood chips to the charcoal or smoker box. If using a charcoal grill, add enough additional lit charcoal to maintain the grill’s temperature between 250° to 300°F. Swap the positions of the racks if one rack is getting darker than another. If any parts are looking dry, brush the surface with water. Continue to cook the racks, with the lid closed, for 1 hour more.
- After two hours of cooking, turn the rib rack around and continue cooking the racks until the meat has shrunk back from the bones at least ½ inch in several places, 2 to 2½ hours more. Maintain the temperature of the grill between 250° to 300°F by adding more lit charcoal and opening and closing the vents. Meanwhile, make the sauce.
- In a medium saucepan combine the wine, brown sugar, and vinegar. Bring to a boil over medium-high heat on the stove and cook until about half of the liquid has evaporated. Add the remaining sauce ingredients, mix well, and bring to a simmer. Reduce the heat to low and cook the sauce for 15 to 20 minutes, stirring occasionally.
- When the meat on the racks has shrunk back from the top of the bones by ½ inch, remove the racks and the rib rack from the grill. Brush the racks on both sides with some of the barbecue sauce and immediately wrap each rack in heavy-duty aluminum foil. At this point you can finish cooking the racks or set them aside for 1 to 2 hours until you are about 1 hour away from eating.
- Return the foil-wrapped racks to the grill, stacking them on the cooking grate over indirect low heat (250° to 300°F). Cook them, with the lid closed, until the meat is tender enough to tear with your fingers, about 1 hour. Remove from the grill and lightly brush them on both sides with some remaining sauce. Cut the racks into individual ribs. Serve warm.
let's Gear up
Recommended Tools
let's Gear up
Recommended Tools
Recommended Tools carousel, use the previous and next arrows to navigate, or jump to any slide with the slide bullets.
