Save on select Weber Works™ Accessories* Shop Now.
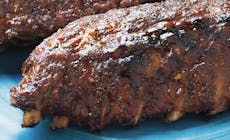
Caribbean Baby Back Ribs with Guava Glaze
Recipe from Weber's Time to Grill™ by Jamie Purviance
Fuel Type:
- Serves 4
People
Serves 4
Prep Time
15 mins
Grilling Time
3 to 4 h

Ingredients
Instructions
the Ingredients

Rub
Special Equipment
- rib rack
Pellet Flavors
Instructions
- Prepare the grill for indirect cooking over low heat (250° to 350°F).Place a large foil pan on top of the Flavorizer bars, below the cooking grate. Fill it halfway with room temperature water. Prepare the grill for cooking over medium-low heat (300°F).Prepare the grill for indirect cooking over medium-low heat (250° to 350°F).
- In a small bowl mix the rub ingredients.
- Using a dull dinner knife, slide the tip under the membrane covering the back of each rack of ribs. Lift and loosen the membrane until it breaks, then grab a corner of it with a paper towel and pull it off. Season the ribs all over with the rub, putting more of it on the meaty sides than the bone sides. Arrange the ribs in a rib rack, all facing the same direction. Allow the ribs to stand at room temperature for about 30 minutes before grilling. Meanwhile, make the glaze.
Related Grill Skills
Removing the Membrane from Baby Back RibsUsing a Rib Rack - In a small saucepan mix the glaze ingredients. Cook over medium heat on the stove until the butter is melted, about 5 minutes, stirring often. Remove from the heat.
Related Grill Skills
Mincing GingerMincing Garlic - Brush the cooking grates clean. Place the racks over indirect low heat, as far away from the heat as possible, with the bone sides facing toward the heat. Close the lid. After 3 hours, check to see if any rack is ready to come off the grill. They are done when the meat has shrunk back from most of the bones by ½ inch or more. When you lift a rack by picking up one end with tongs, the rack should bend in the middle and the meat should tear easily. If the meat does not tear easily, continue cooking for up to 4 hours.Brush the cooking grates clean. Place the racks over indirect medium-low heat, with the bone side down. Close the lid. After 3 hours, check to see if any rack is ready to come off the grill. They are done when the meat has shrunk back from most of the bones by ½ inch or more. When you lift a rack by picking up one end with tongs, the rack should bend in the middle and the meat should tear easily. If the meat does not tear easily, continue cooking for up to 4 hours.Brush the cooking grates clean. Place the racks above foil pan, over medium-low heat, with the bone side down. Close the lid. After 3 hours, check to see if any rack is ready to come off the grill. They are done when the meat has shrunk back from most of the bones by ½ inch or more. When you lift a rack by picking up one end with tongs, the rack should bend in the middle and the meat should tear easily. If the meat does not tear easily, continue cooking for up to 4 hours.
Related Grill Skills
- Remove the racks from the rib rack and transfer to a sheet pan. Lightly brush the racks on both sides with the glaze. Lay the racks flat on the cooking grate, with one rack at a time over direct heat. Grill them, with the lid closed, until the racks are a little crispy on the surface, 10 to 15 minutes, brushing them, turning them, and swapping their positions occasionally. Return the racks to the sheet pan, give them one last coating of glaze, and cover with foil to keep warm for as long as 15 minutes. Cut the racks between the bones into individual ribs and serve right away.Remove the racks from the rib rack and transfer to a sheet pan. Lightly brush the racks on both sides with the glaze. Lay the racks flat on the cooking grate over medium-low heat. Grill them, with the lid closed, until the racks are a little crispy on the surface, 10 to 15 minutes, brushing them, turning them, and swapping their positions occasionally. Return the racks to the sheet pan, give them one last coating of glaze, and cover with foil to keep warm for as long as 15 minutes. Cut the racks between the bones into individual ribs and serve right away.
