Save on select Weber Works™ Accessories* Shop Now.
Mastering the Weber Sear Zone: Your Secret Weapon for Perfect Searing
If you’re looking for bold flavors, sizzling crusts, and those perfect grill marks that make your food look like it came straight from a high-end steakhouse, the Weber Sear Zone is about to become your new favorite grilling feature. This high-powered section of the grill cranks up the heat on one side, giving you total control for a flawless sear. Let’s fire things up and dive into how to use this grilling powerhouse.
What is the Sear Zone?
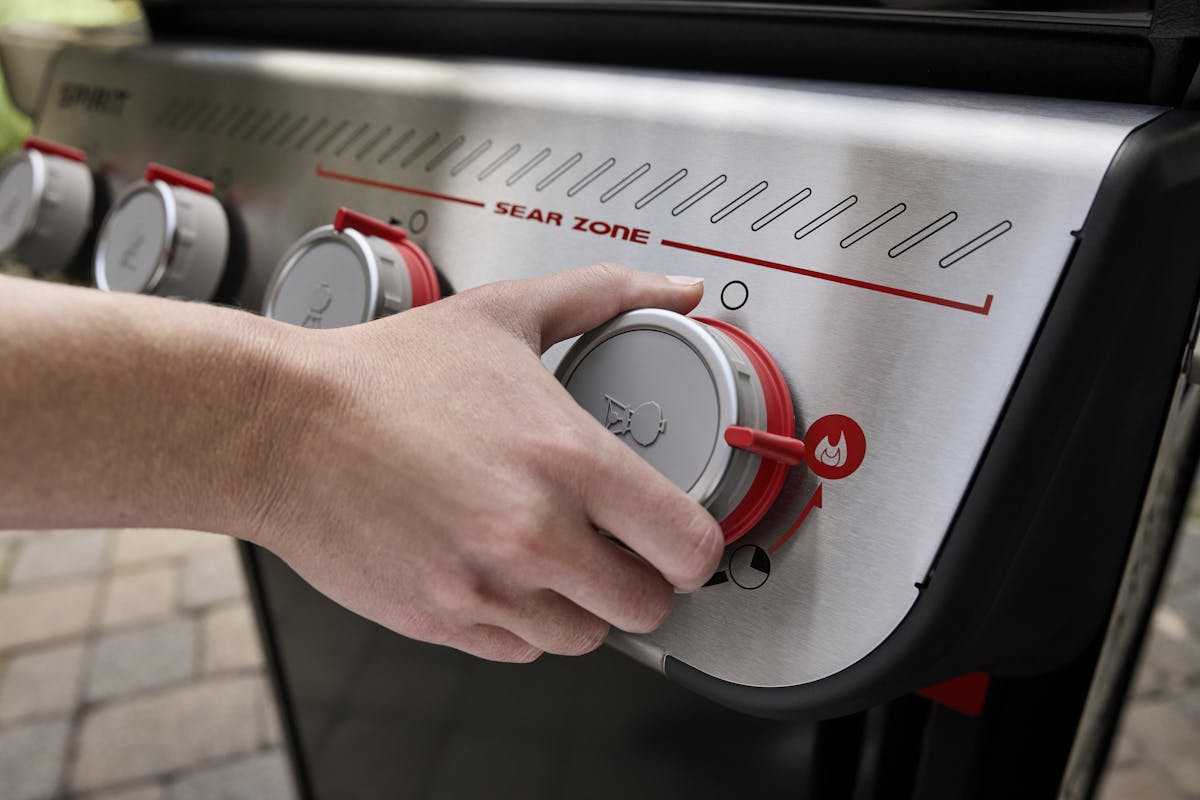
Weber Sear Zone ramps up the heat on certain burners to create an extra-hot section of the grill. That intense, focused heat gives you the power to create the perfect sear every time.
It’s your go-to tool for high-heat precision cooking and can help you:
- Sear steaks and chops to build that crisp, flavorful crust.
- Get the perfect cook on thinner cuts of meat.
- Create pro-level grill marks that'll impress anyone at the table.
Think of it as your grill's turbo mode — ready to take your cooking game up a notch.
How to Use the Sear Zone Like a Pro
1. Preheat Your Grill
- Fire up all the burners, including the sear zone, to high heat.
- Close the lid and let the grill heat up for at least 15 minutes. This gets the grates hot enough for a quick, caramelized crust.
- Once the grill is hot and clean, adjust the temperature depending on what you’re cooking—whether you want a blazing sear right off the bat or start with indirect heat and finish with a sear.
2. Clean Your Grill Grates
- Give the grates a good scrub with a grill brush to clear off any leftover bits from past cookouts.
- A clean grate means better sear marks, less sticking, and more even cooking.
3. Prep Your Food for Success
- Lightly coat your food with oil instead of the grates—this prevents sticking and amps up the caramelization.
- Season with salt, pepper, or your favorite rub to amp up the flavor before you hit the heat. Just be warned—seasonings with a lot of sugar or big chunks of spice can burn easily when using the sear zone.
Choosing Your Searing Method
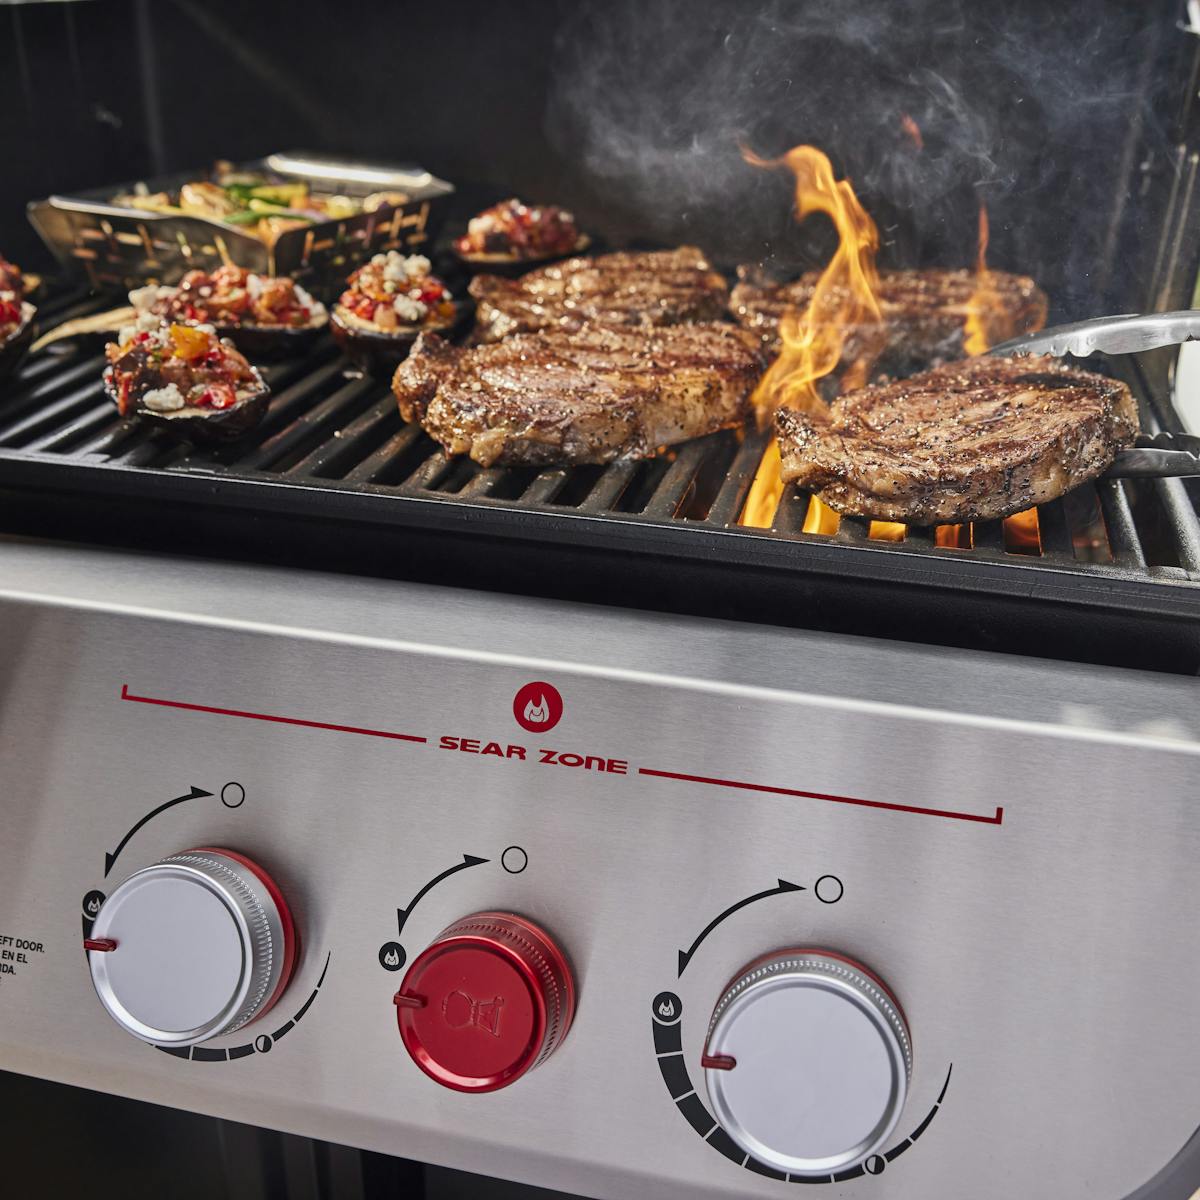
Option 1: Sear and Slide (Sear First, Finish with Indirect Heat)
- Set the grill to high heat and activate the sear zone.
- Sear both sides of your food over the sear zone for 1–3 minutes per side.
- After searing, turn off the sear burner, drop the other burners to low, and move the food to the indirect heat to finish cooking.
- This is a a fast and easy way to cook thicker cuts like ribeye steaks, bone-in pork chops, and chicken breasts.
Option 2: Reverse Sear (Cook First, Sear Last)
- The reverse sear is the same concept as the sear and slide, just in reverse.
- First cook your food over indirect heat, at around 225–275°F until it’s almost at your preferred doneness.
- Take it off the grill and crank the burners up to high, including the Sear Zone.
- Place the food back on the grill and sear for 2–3 minutes.
- This is best for larger, thicker cuts like filet mignon, tomahawk ribeye, or thick-cut pork chops. It’ll take longer than the sear and slide method, but you’ll have more even cook results.
Option 3: Sear While Grilling
- Set your grill for direct high heat, including the sear burners, and brush the grill grates clean.
- Place your food directly over the Sear Zone and sear while it cooks.
- This is best for thinner cuts like skirt steak, thin pork chops, or other quick-cooking proteins.
Rest and Serve Like a Pro
- Take your food off the grill and let it rest for about 5 minutes before cutting into it.
- This gives the juices time to settle back into the meat, keeping every bite tender and flavorful.
Top Searing Tips for Success
- Oil the Food, Not the Grates – It keeps sticking to a minimum and improves the sear.
- Keep the Lid Closed – The lid helps maintain steady, high heat for the best crust.
- Clean as You Go – Make sure your grill grates are clean. Give them a good scrub with a grill brush once the grill is nice and hot.
Why You’ll Love the Sear Zone
The Weber Sear Zone turns up the heat—literally—giving you a dedicated space to achieve top-notch searing results. With the sear zone, your grill becomes a high-powered tool for creating restaurant-quality meals at home. Fire it up, experiment with your favorite cuts, and get ready to grill like a pro.

