Save on select Weber Works™ Accessories* Shop Now.
Top Tips from our Grill MasterHow to Grill Biscuits
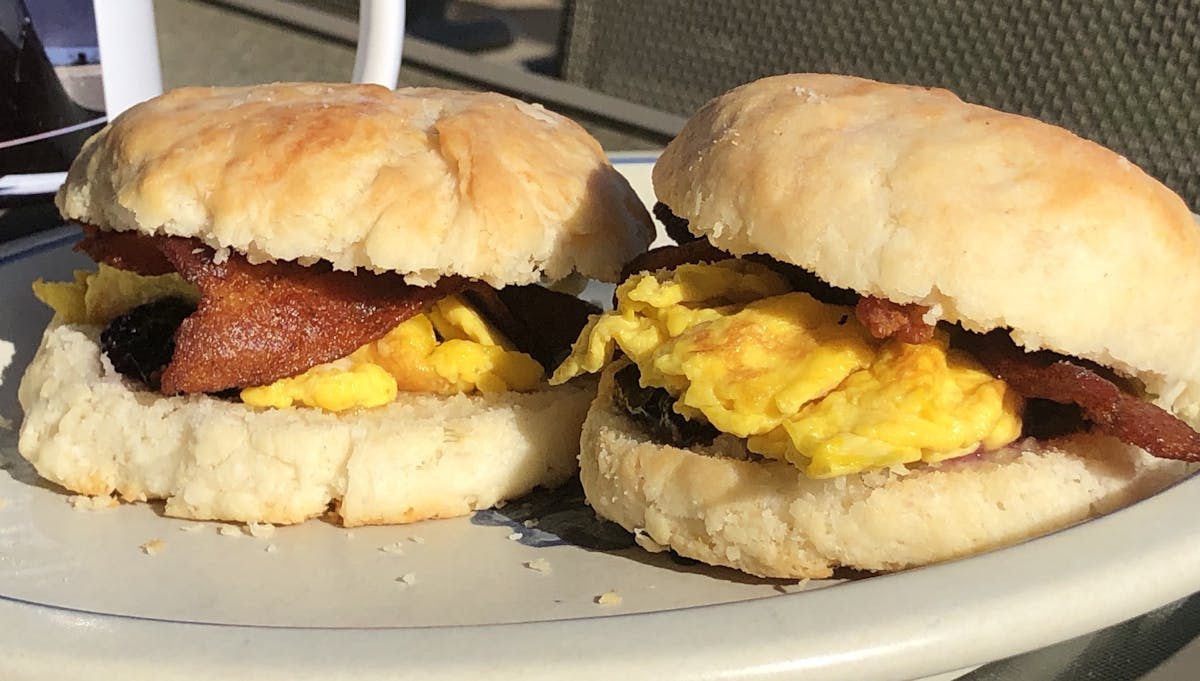
Grandma's Buttermilk Cathead Biscuits
Growing up in south Georgia biscuits are a common staple on the breakfast table and in some cases lunch and dinner. When it comes to the process of making biscuits there are many different formulas, but the one I’m going to go over with you today is the one my grandma taught me with a couple of my own touches that I added once I started making these biscuits regularly.
This style of biscuit referred to as a Cathead Biscuit has been around for a very long time and to someone who is not familiar with the name, it can be a little confusing.
Why is it called a Cathead Biscuit? I’m glad you asked. The name comes from the shape and size of the biscuit. It was said that the biscuit is the size of a cat’s head hence the name cathead biscuit. In the south we give things a name a lot of times based on what it reminds us of and this is one of those examples.
This style biscuit is unique because it is crunchy on the outside, fluffy and soft on the inside and firm enough to hold up when using it for sopping up syrup or gravy on the plate.
This biscuit may not win any beauty contest for being perfectly uniformed, but that’s because this biscuit was meant to be made quickly because you had farm work that needed to be done and you didn’t have time for kneading, rolling and cutting.
This biscuit is formed by taking the dough and pinching, rolling, and plopping it into a bacon greased skillet or pan.
I’m going to talk you through how to recreate these classic southern biscuits on your grill.
How to Bake Biscuits on the Grill
Buttermilk Biscuits
By Grandma Pruitt, Adapted for the grill by Jason Pruitt
Ingredients
2 Cups Self-rising flour
1 Cup Buttermilk
1 Tbsp Lard
1 Tbsp Honey
½ Stick Salted Butter (grated)
½ Cup Self-rising flour (For working the dough)
1 Tbsp Bacon grease or vegetable oil (To oil the cast-iron griddle or skillet)
Instructions
Prep Steps:
1. Combine flour & buttermilk slowly into a bowl gently incorporating the two ingredients.
2. Add lard, honey, & butter to the mixture and continue to combine the ingredients together.
3. Once ingredients are combined and you have a dough ball formed, transfer your dough onto a clean table or dough mat to start working your dough. Tip: make sure to use the ½ cup of flour to coat your table/dough mat so that your biscuit dough does not stick and is easier to work with.
4. Gently roll and fold your dough but make sure not to work it too much because this can make the biscuits too tough instead of soft and fluffy.
5. Once your dough is nicely formed and has a pillow texture to it, it’s time to form your biscuits and place them on your greased skillet. (pinch, roll & plop)
Baking Steps:
1. Pre-heat your grill & set your grill for an indirect cook, with a temp setting of 350-400 degrees. This is achieved by turning your outside burners on Medium & your center burner to off.
2. Place your cast-iron griddle or skillet on the grill over indirect heat and bake your biscuits for 20 minutes.
3. Serve biscuits warm and ENJOY!
Top Tips
- Don’t over work the dough. The process from mix to form should be about 10 minutes.
- Make sure the butter is cold before you grate it. It’s good to stick the butter in the freezer for about 15-20 minutes before you grate it so that it does not start to melt on you. You want the butter to melt while the biscuits bake.
- To make handling the dough easier, place a little flour on your hands. This will keep the dough from sticking to your hands and make transferring it to the pan easier.
- Add more flavor. For that added depth of flavor & color, take the remaining half a stick of butter and use it to coat the biscuits for the last 5 minutes of the cook.

So there you have it, Grandma’s Buttermilk Cathead Biscuits. Hopefully these will make it on the menu for your next breakfast or brunch.
The really fun part is figure out what to eat with them! Next time I will cover cheese grits and sausage gravy, both of which go great with biscuits.
Have fun with this recipe and please share your pics! We’d love to see what you grill! #StayInGrillOut


